


Autumn is finally here! It's our favourite time of the year here at Crafty Party Box and we love finding crafty ideas from nature and using the warm autumnal colours as inspiration. We want to make crafting accessible to everyone which is why we put so much thought and care into creating our craft boxes so whether you're too busy to find materials or come up with seasonal ideas or maybe crafting just isn't your forte, don't worry! In our kits and boxes we provide all the materials you need, clear easy-to-follow instructions plus activity sheets, stickers and more to make crafting a breeze for you but still as creative, exciting and engaging for your little ones! We also know that as we've all been hit by a big worldwide pandemic (thanks Covid) we might not have as much extra cash lying around these days yet we still have to find ways to entertain the kiddies for hours on end. So, we've put together 4 fun Autumn craft ideas for you to enjoy at home which are incredibly cost effective as you probably have all the materials at home! (There is also a free “Autumn leaves” template for you to print out at home, colour in or paint and use for these crafts.) Let's get started!
Autumn wreath

The good thing about this wreath is it's long lasting as the leaves are made out of paper. You can also personalise the design, colours, and add as little or much as you like to it. (Plus, it looks really cute!)
- Cut out the centre of a paper plate so you're left with the outer ring to make the base of wreath. (Kiddies may need an adult's help for this bit). We used a 7-inch plate as we wanted a small wreath but you can definitely use a larger one. If you don't have paper plates or if you want to make a massive wreath, then you can cut out a circle from cardboard instead. This will also make it a little bit sturdier.
- Next paint the wreath. This is optional. You can choose to use colouring pencils, crayons or even leave the wreath
the colour as it is. We used orange paint as it looks nice through the gaps in between the leaves.

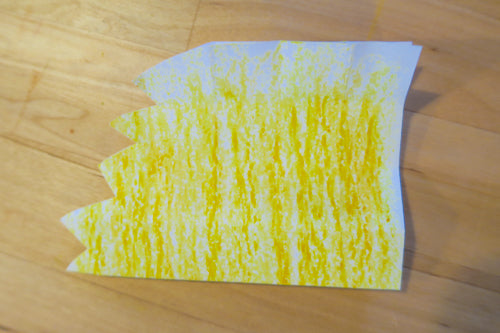
- We've made and provided you with a free 'Autumn leaves' template which you can print
out and use for your wreath. While the paint is drying, you can print this out. We printed onto A4 coloured card
(red, orange and yellow) to imitate those lovely Autumn colours but you can also print onto plain white card and
colour them in yourselves. Again, you can use colouring pencils, crayons or even watercolours to mix the colours up
and create those lovely patterns we see on natural leaves.

- Cut the leaves out (Again, little ones might need help with this step. Be careful with the scissors as lots of
tricky bits!)

- Next step is to just start sticking the paper leaves and acorns all around the wreath. I used a simple glue stick but a small dot of PVA glue also works. I think the less of a pattern and the more naturally you layer the leaves, the more realistic it will look.
- And done! That's your easy Autumn wreath finished. You can add a little bit of string to hang it up on simply hang onto a door hook to display.
Autumn Garland

As we had lots of leaves left over from our wreath craft we decided to turn them into a lovely Autumn garland. We also added some extra 3D paper leaves for effect.
- Cut an A4 sheet of paper into 4 (Makes 4 leaves).

- Decorate the pieces of paper to make your leaves. We used crayons and used a combination of orange, red, yellow
and brown to imitate the changing of the leaves. I think mixing watercolours here would look amazing too!

- Fold the paper in half, then half again and half once more time to create guidelines for later. Next open it up again until it's only folded in half once and cut out your leaf shape. You can experiment with different shapes to create different curved or spikey edges.

Nature Hedgehog!

This was such a fun craft to make as I had my 1 year old cousin help me collect all the leaves, conkers, sticks and more while out on a walk and he was very happy to be involved. This activity is great to get the kids out for a walk in nature and to get a breath of fresh air.
- Collect a variety of both fresh and dry leaves, conkers, sticks and more. Everything we used in this craft was
collected from the ground from little bits and bobs that had fallen from trees as we didn't want to pick anything
fresh.

- Next draw and cut a simple hedgehog shape out of cardboard. (Adults help needed for this bit).


- Ok here comes the fun part as you can make the hedgehog 2 different ways:
- You can use a little tool to make lots of little holes in the hedgehog and get the kids to have fun
threading
through the leaves, sticks and everything else you collected. This is a great way to make the activity a bit
more
dynamic and practice fine motor skills at the same time!


- You can simply stick on the nature bits and bobs you collected. The advantage of this is you can fill up the
space on the hedgehog even more by layering and make the body look fuller as well as being able to stick on
conkers and other bigger bits that are hard to thread through.

- You can use a little tool to make lots of little holes in the hedgehog and get the kids to have fun
threading
through the leaves, sticks and everything else you collected. This is a great way to make the activity a bit
more
dynamic and practice fine motor skills at the same time!
- Whichever method you choose, the idea is for the kids to have fun with nature and turn it into art. The good thing is there's no neat pattern to follow. Make the hedgehog as full and hectic as you like to give it a spiky 3D effect and just have fun with it!
'Messy hands' Autumn Tree

This one is pretty simple and straightforward but definitely a fun one to have some messy art play with and a really easy craft for very young ones.
- Get your little one to draw around their hand on an A4 sheet of paper or card.

- Paint the hand silhouette with brown paint.

- This is the messy part! Let them use their fingers and paint to create 'leaves' on the tree. They can even mix
the
colours together with their hands to create new tones and learn about colour mixing. We used orange, red and
yellow
to
imitate the change of leaves through Autumn again but you can really adapt the style and colours of this craft to
fit
in with any time of the year!


We hope you enjoyed these ideas and crafts and remember to tag us on Instagram, Facebook or Twitter @craftypartybox if you make any of them as we LOVE to see your creations!
We have a Halloween blog post coming next week as well as the launch of our Christmas craft boxes! So, keep your eyes peeled, exciting!
Also, just a reminder that our Halloween craft boxes are nearly sold out. (They include materials and instructions for 4 spooktacular crafts!) so if you're thinking of getting one to keep the kids entertained on the day – or on the build-up to Halloween then head over to our website to get yours now before they run out!
Don't forget to subscribe to our email list so you never miss out on new product releases or the latest blog post.